arm虚拟机环境搭建
arm的虚拟机运行环境搭建,分文Qemu和arm-linux-gcc两部分。
Qemu+arm
需要大概三样东西,qemu,linux内核,以及busybox的文件系统。
环境安装
sudo apt-get install gcc-arm-linux-gnueabi #交叉编译工具链
sudo apt-get install zlib1g-dev
sudo apt-get install libglib2.0-0
sudo apt-get install flex bison
sudo apt-get install libpixman-1-dev
sudo apt-get install libglib2.0-dev   #这五个是Qemu要用到的
准备一个文件夹单独用来装环境吧
qemu
先下载Qemu的安装包,
wget https://download.qemu.org/qemu-4.0.0.tar.xz
然后对qemu做配置,用以支持模拟arm架构下的所有单板:
./configure –target-list=arm-softmmu –audio-drv-list=
然后编译、安装
make
make install
编译内核
编译内核得到镜像文件zImage
生成面向vexpress的默认config
make CROSS_COMPILE=arm-linux-gnueabi- ARCH=arm vexpress_defconfig
然后编译:
make CROSS_COMPILE=arm-linux-gnueabi- ARCH=arm
然后就可以先试试qemu加载内核,如果能成功显示出来内核的启动信息就是到这里成功了。
qemu-system-arm -M vexpress-a9 -m 512M -kernel linux/arch/arm/boot/zImage -dtb linux/arch/arm/boot/dts/vexpress-v2p-ca9.dtb -nographic -append "console=ttyAMA0"
busybox配置文件系统
下载文件
wget http://www.busybox.net/downloads/busybox-1.31.0.tar.bz2
然后设置默认配置,编译安装
make defconfig
make CROSS_COMPILE=arm-linux-gnueabi-
make install CROSS_COMPILE=arm-linux-gnueabi-
期间可能会出现scripts/Makefile.build:197: recipe for target ‘loginutils/passwd.o’ failed 这样的错误,这时可以在BusyBox源码的include目录下/libbb.h 文件添加一行引用 #include <sys/resource.h> ,得以解决。
之后全部按照参考资料1中写的,
mkdir -p rootfs/{dev,etc/init.d,lib}
sudo cp busybox-1.20.2/_install/* -r rootfs/
sudo cp -P /usr/arm-linux-gnueabi/lib/* rootfs/lib/
sudo mknod rootfs/dev/tty1 c 4 1
sudo mknod rootfs/dev/tty2 c 4 2
sudo mknod rootfs/dev/tty3 c 4 3
sudo mknod rootfs/dev/tty4 c 4 4
dd if=/dev/zero of=a9rootfs.ext3 bs=1M count=32
mkfs.ext3 a9rootfs.ext3
sudo mkdir tmpfs
sudo mount -t ext3 a9rootfs.ext3 tmpfs/ -o loop
sudo cp -r rootfs/*  tmpfs/
sudo umount tmpfs
加载文件系统的qemu模拟
之后就可以整合到一起运行了
qemu-system-arm -M vexpress-a9 -m 512M -kernel linux/arch/arm/boot/zImage -dtb linux/arch/arm/boot/dts/vexpress-v2p-ca9.dtb -nographic -append "root=/dev/mmcblk0 console=ttyAMA0" -sd a9rootfs.ext3
arm-linux-gcc
arm-linux-gcc
最后发现居然有这种方法,感觉Qemu白调了。 在这个网站上下arm-linux-gcc-4.4.3-20100728.tar.gz
http://arm9.net/download.asp
然后tar -xvf 解压
文件在opt/FriendlyARM 里。
按照参考资料2中写的,
sudo mkdir /usr/local/arm
sudo cp -r opt/FriendlyARM/toolschain/4.4.3 /usr/local/arm
sudo gedit /etc/bash.bashrc
添加一行export PATH=$PATH:/path/opt/FriendlyARM/toolschain/4.4.3/bin
然后到这里我的全局变量没有添加上,因而又添加了一波变量:
sudo gedit /etc/profile
sudo gedit ~/.bashrc
在这两个里添加了环境变量。
然后使用arm-linux-gcc -o hello hello.c 编译,发现少库
error while loading shared libraries: libstdc++.so.6: cannot open shared object file: No such file or direcory。
因此安装库:
sudo apt-get install libstdc++6
sudo apt-get install lib32stdc++6
然后就ok了
使用echo $PATH看看是不是有了
安装qemu-arm
sudo apt install qemu-user
然后会报错没有库:/lib/ld-linux.so.3: No such file or directory
然后查了资料,可以这么运行:qemu-arm -L /usr/arm-linux-gnueabi -cpu cortex-a15 hello
或者将程序编译成静态的:arm-linux-gnueabi-gcc -o simple -c simple -static
安装了qemu-arm就可以直接使用命令qemu-arm hello运行arm的程序了
使用arm-linux-gdb调试arm程序
按照参考文献的3中说的
./configure --target=arm-linux --prefix=/usr/local/arm-gdb -v
make
make install
sudo gedit /etc/profile

export PATH=$PATH:/usr/local/arm-gdb/bin
试验了8.1 ,7.4两个版本,最终还是最新版的8.3安装成功了
然后如何使用:
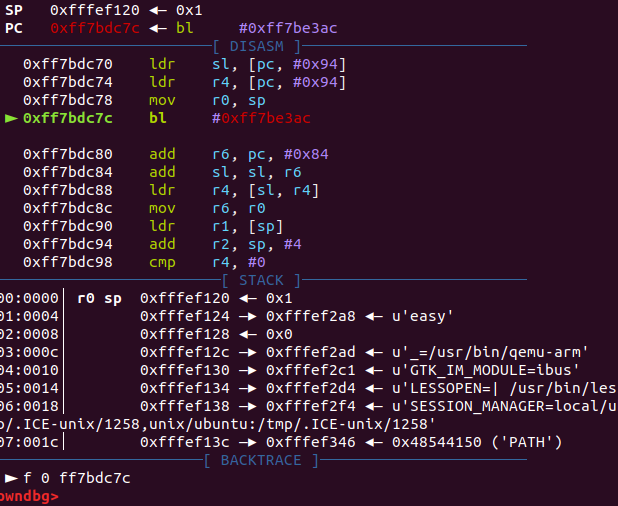
开一个terminal,qemu-arm -L /usr/arm-linux-gnueabi -cpu cortex-a15 -g 1234 easy
再开另一个terminal,arm-linux-gdb ./easy,然后输入target remote localhost:1234。
就可以愉快的调试啦

参考文章
https://blog.csdn.net/linyt/article/details/42504975?utm_source=blogxgwz8
http://blog.sina.com.cn/s/blog_13279ca6d0102xb0f.html https://blog.csdn.net/kangear/article/details/8635029